
Whether you’re starting a kitchen garden, edible flowers, or herbs, proper seed starting will set you up for success. You can technically start seeds indoors throughout the year, but take a look at this guide to determine which dates are best for your zone.

SUPPLIES NEEDED
Watering can
Gardening gloves
Trowel
Seed starting mix
72-cell plug flat
Flat tray
Clear lid
Pots
Seeds
Optional:
Extra labels
Heating pad
Grow light

STEP 1
Add your seed starting mix to a large bowl or planter, thoroughly moistening with water.

STEP 2
Fill the cells of your seed tray, gently tamping down to eliminate any air pockets.

STEP 3
Using your metal garden markers, a pencil, or a finger, make a shallow indentation for your seed.
A good rule of thumb is to plant your seed as deep as its longest side. For the seeds we’re planting today – this isn’t deep at all.

STEP 4
Empty your seed pack into a dish for easy access and sprinkle a few seeds (2-3) into each cell.

STEP 5
Gently cover newly sown seeds with a dusting of seed starter mix.

STEP 6
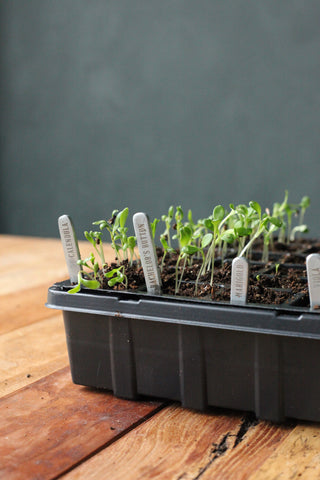
Label each row with a garden marker.
Cover with your clear lid and set in a warm spot – near a radiator or even on a heating pad.

STEP 7
Your seeds are likely to sprout before watering is necessary, but check the soil every few days to make sure it hasn’t dried out. If water is necessary, bottom water to avoid disturbing the seeds.
STEP 8
Once the majority of the cells have sprouted seedlings, remove the cover and set the tray in a spot with bright light – or under a grow light.

STEP 9
Check on the seedlings frequently – daily or every other day, making sure that the soil stays moist.
If you are not using a grow light you will likely need to rotate your tray regularly to balance the lean of the seedlings towards the sun.

STEP 10
Once your seedlings begin to outgrow the tray, you can start the process of ‘hardening off’ or transitioning them outdoors – as long as there is no chance of frost. Set the tray outdoors, in a safe spot, for an increasing amount of time each day. Start with a couple hours on day one and gradually increase over the course of a week. Once they’re fully acclimated to the outside temperature, they can remain outdoors.
If it is not yet warm enough for this, gently poke them out of the tray and transplant with regular potting soil into larger pots. Move the pots as needed.

Share your garden progress with us. We’d love to see what you grow.
For more thoughts on garden planning, visit this post and keep an eye out for more tips and tricks.